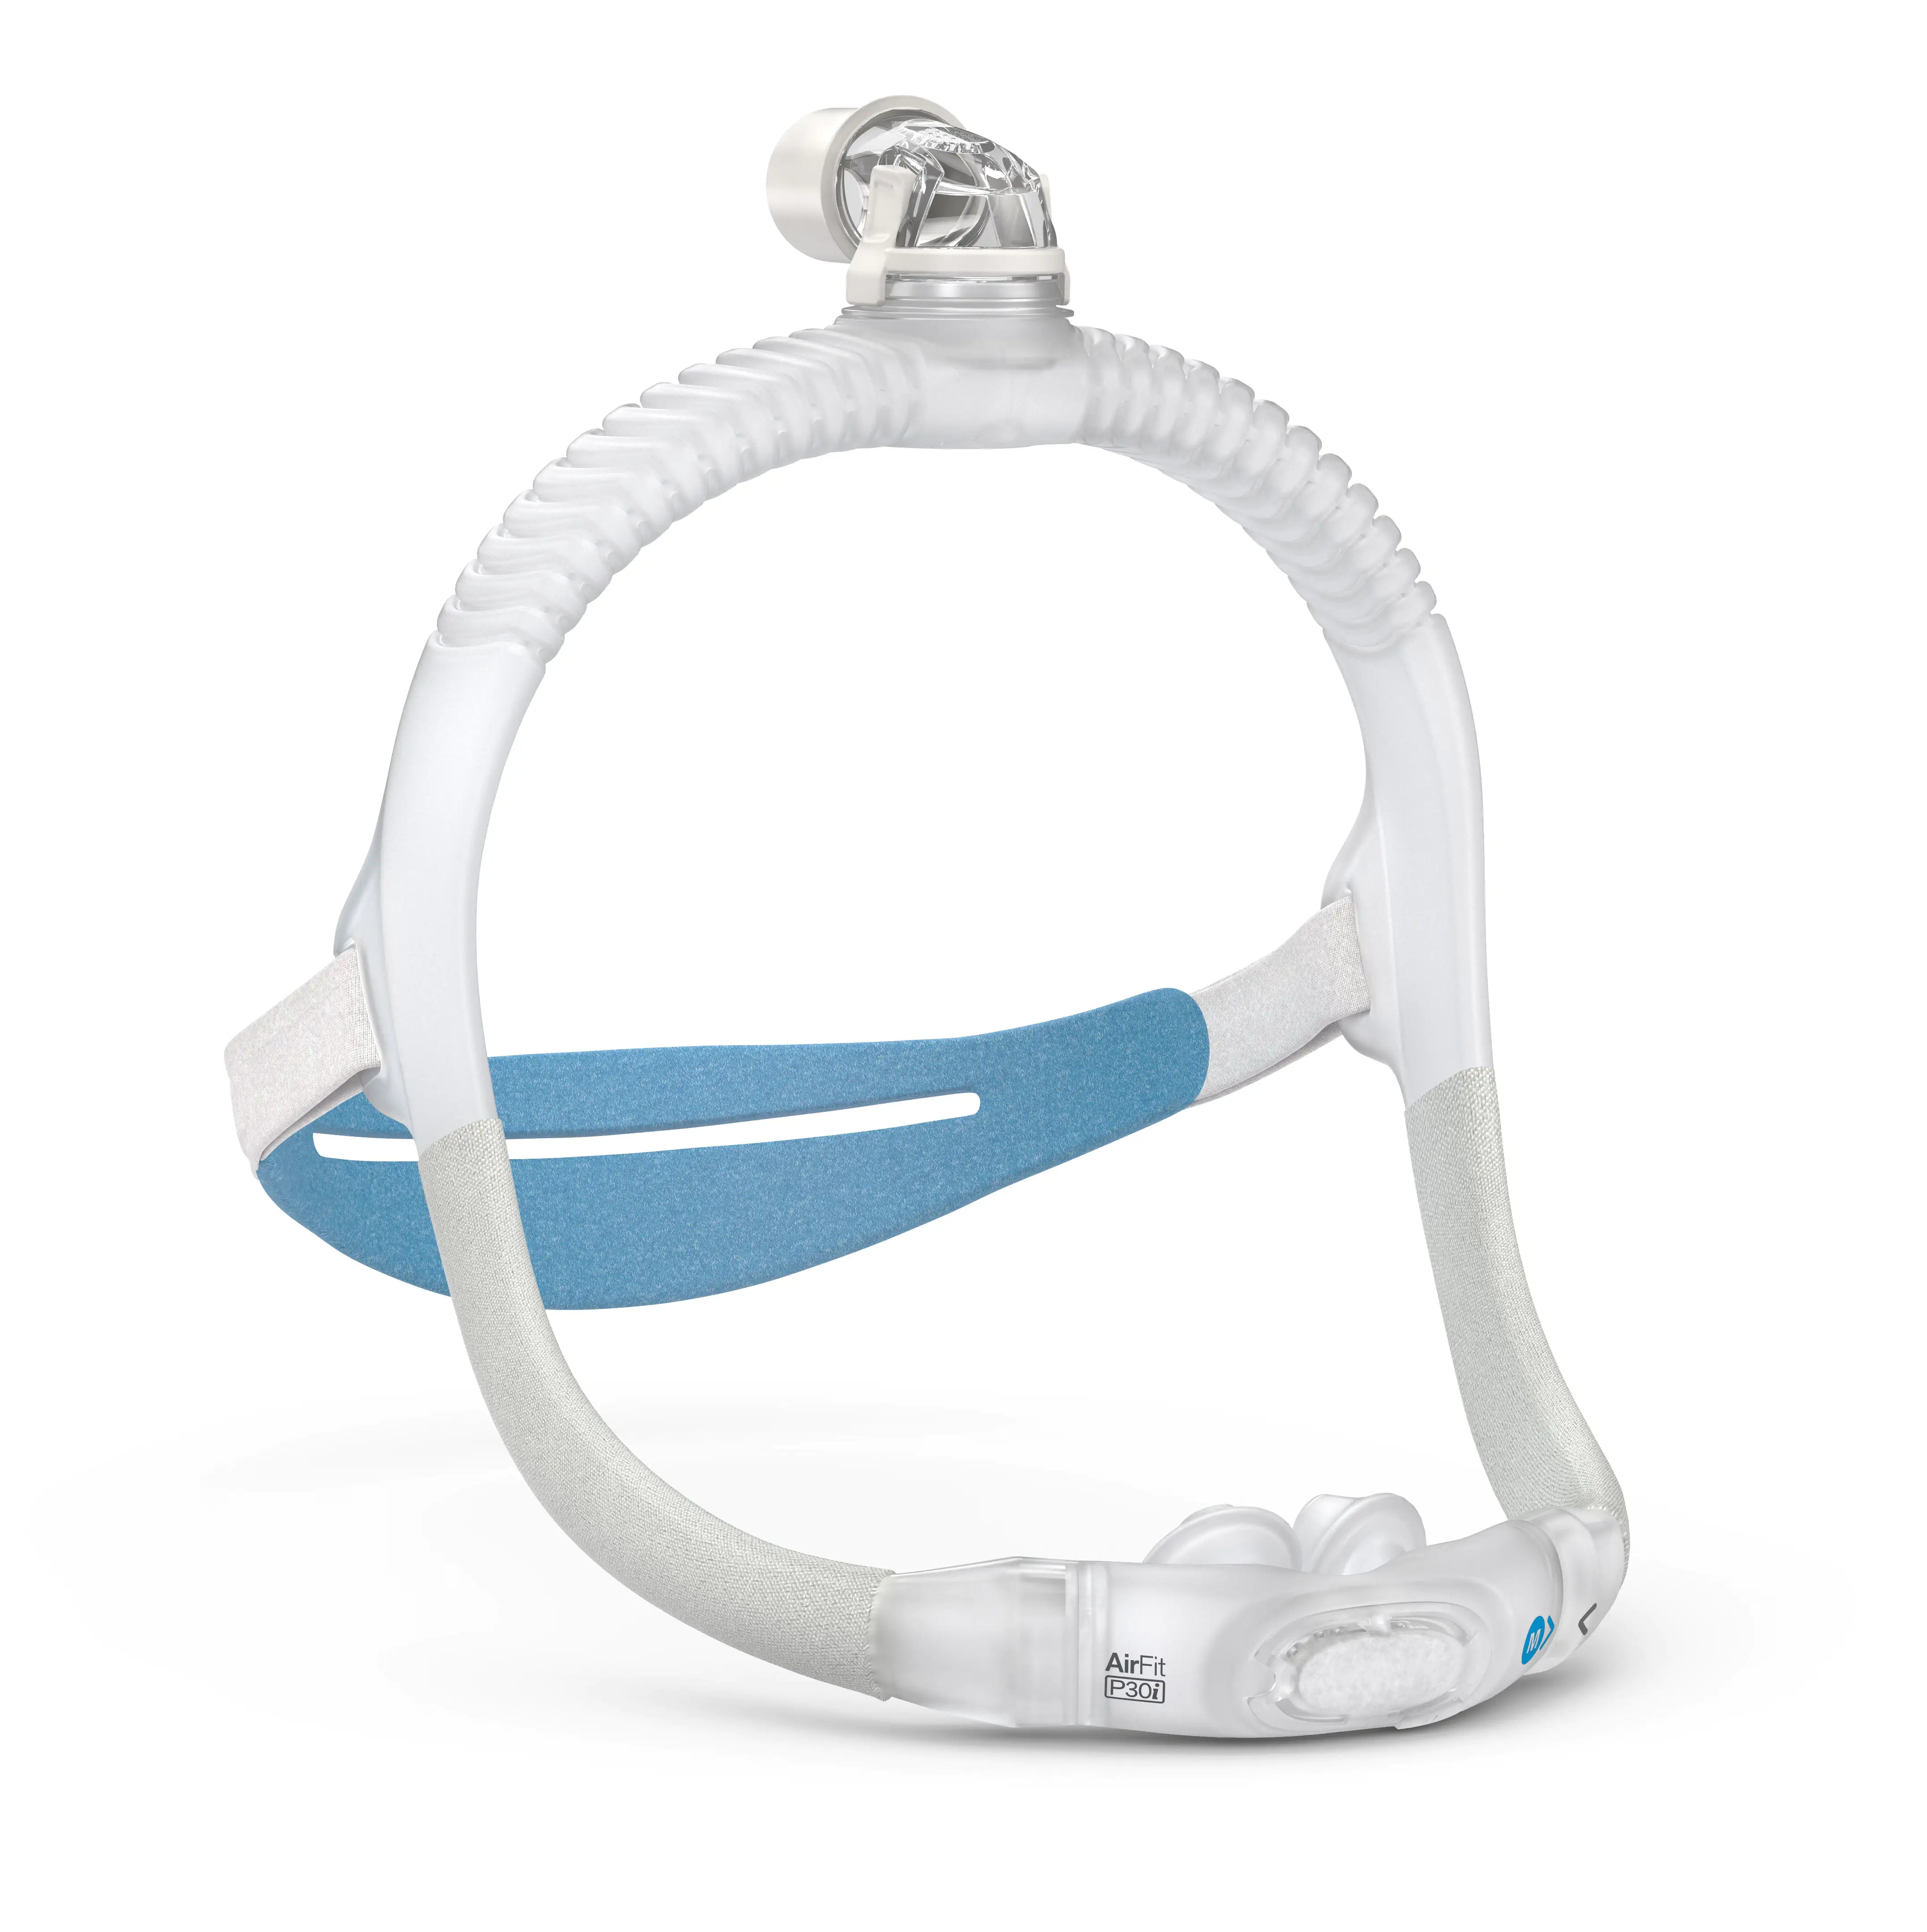
AirFit P30i

  • Top-of-the-head tube design gives patients the freedom to sleep in many positions
  • AirFit P30i pillows cushion is interchangeable with AirFit N30i nasal cushion
  • QuietAirTM diffused venting designed to minimise noise and disruption
  • SpringFit frame is designed for fast and accurate fitting
  • Only two AirFit P30i mask starter packs for easy stock management
airfitp30i_hero_image

A more natural sleep experience

ResMed AirFit P30i is designed to feel more natural, with a top-of-the-head tube design that keeps tubing out of the way and gives patients the freeom to sleep in many positions.

It also features ResMed's QuietAirTM vent technology that gently diffuses exhaled air to minimise noise and disturbance, designed to allow patients to sleep closer to their bed partner.

Designed for a first-time fit

The SpringFit frame comes in only two sizes and is designed to adjust to different facial profiles to provide a broad range of fit. This means you spend less time on patient setup with more fitting confidence.

Simplified ordering and inventory management

AirFit P30i has only two starter pack options; Standard with three pillow sizes, and Small with two pillows sizes. Simplifying your logistics, this limits mask-to-cushion configurations for streamlined ordering.

Support

Supporting you
Supporting your patients
Swipe

Choosing the right frame size

  1. Go to the sizing section in the user guide to determine which frame size is most suitable. 
  2. For male patients, start with the standard frame size. For female patients, start with the small frame size.
  3. If the frame is too large, try the small size frame for a better fit.
  4. If you try the small frame first and the frame sits too close to your patient's eyes, size up to the standard frame for a better fit.
  5. If the frame is too small, try the standard size frame for a more comfortable fit.

Fitting

  1. Pull the mask frame and headgear over your patient's head so that the elbow is at the top of their head and the headgear is behind it. 
  2. Place the cushion under your patient's nose and align the pillows into their nostrils.
  3. Tighten or loosen headgear until the mask and cushion fit comfortably.
  4. Squeeze the elbow's side buttons and pull the elbow away from frame.
  5. Connect the air tubing from the device to the elbow and then reattach the elbow to the frame.

Managing mask leak

  1. If air escapes the mask from anywhere other than the masks vents, you will need to locate the leak and try each of the following steps to correct it.
  2. Try wiggling the mask side to side to realign the cushion and the pillows.
  3. Try resealing the mask by pulling the cushion and pillows away from your patient's face and letting them settle back into position.
  4. Try adjusting the headgear straps to secure the cushion closer or further away from your patient's face.

Daily mask cleaning

  1. Take the cushion off the frame as per disassembly instructions. 
  2. Soak the cushion in warm water and a mild liquid detergent, and ensure there are no air bubbles while soaking.
  3. Hand wash the cushion with a soft bristle brush, paying extra attention to the vent holes.
  4. Rinse the cushion thoroughly under running tap water.
  5. Shake the cushion to remove excess water. 
  6. Leave the cushion to air dry away from direct sunlight.

Weekly mask cleaning

  1. Disassemble the mask into its components as per disassembly instructions.
  2. Soak each of the components (elbow, frame and headgear) in warm water and a mild liquid detergent, and ensure there are no air bubbles while soaking.
  3. Hand wash elbow and frame with a soft bristle brush and the headgear with your fingers.
  4. Rinse each of the components thoroughly under running tap water. 
  5. Squeeze the frame sleeves on a clean towel to remove excess water.
  6. Leave the mask components to air dry away from direct sunlight.

Assembling the mask

  1. Ensure you have all the mask components and parts together.
  2. Connect the elbow to the top of the frame until it clicks in.
  3. Insert the headgear straps into the frame and fold the fastening tabs back to secure.
  4. Insert the ends of the frame into the cushion while ensuring that the arrows present on both the cushion and frame are aligned.

Disassembling the mask

  1. Ensure your mask is disconnected from your machine.
  2. Pull the cushion out from the frame.
  3. Unfasten the tabs from the headgear and pull the straps out of the frame.
  4. Squeeze the elbow's side buttons and pull the elbow up and away from the frame.

Vent connection

  1. To disconnect the vent, gently pull the nasal pillows piece away and slide the vent out. 
  2. To reconnect the vent, align the notch on the nasal pillows piece with the groove on the vent, and then gently pull the nasal pillows piece over the vent. 
travellingwithyourequipment

Access extra service and support by registering your ResMed product.

Learn more
resmedmyair_b2c

For further support, our free myAir program offers ongoing care and guidance via personalised therapy tips, coaching and advice.

Learn more
registeryourproduct

If you have any questions regarding warranty information on our masks, please contact our local customer service team.

Learn more

An ecosystem of solutions for individual answers

From diagnostics and healthcare informatics to therapy devices and masks, our solution can help you get a better night's rest. Crafted to offer both confidence and flexibility, our products allow for a high-quality therapy experience catered to your needs.

Our device, mask and accessory ranges, together with our online support program myAir™, enable you to easily customise your therapy experience to your preferences.

References

1

ResMed external 7 days clinical study of existing 24 ResMed and non-ResMed patients, conducted between 21/02/2018 - 12/03/2018. Data on file; ID A4320645.